Since I started playing with electronics, I dreamed of building my own robot. Not buying a kit, but making every part of it myself. It took quite a while, almost 11 months, not full time, of course, but on and off, with smaller projects and work in between.
Last year I bought a small used lathe, then a small mill and beginning of this year, 2014, a ShapeOko 2 CNC mill. Every machine has it’s own rabbit hole. Hard to not get lost for a beginner like me. So many ways to screw up. I checked a couple.
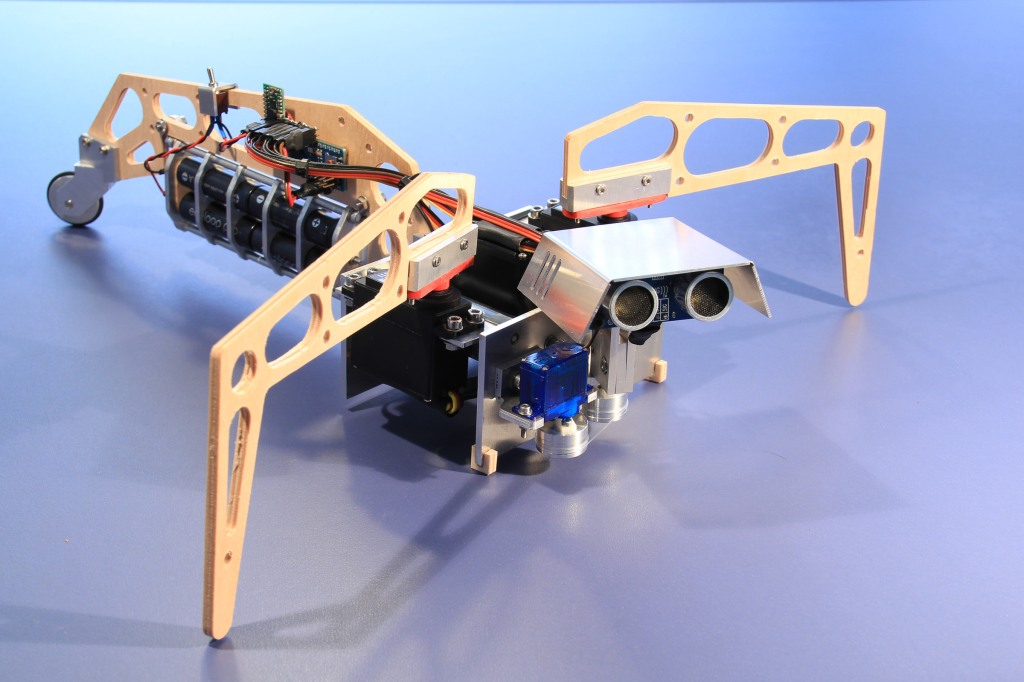
So here it is, my very first robot, halfbug. All parts are machined and manufactured by myself, not counting the Arduino board and the servos. Everything is screwed or clamped together without any glue.
Well, almost.
Manufacturing parts
Manufacturing all parts took most of the time. I started designing parts in QCad (2D only). Then if the parts were out of plywood or aluminum plate, I would import the model into CamBam. After that, sending the gcode with the Universal Gcode sender to my ShapeOko 2. Then milled and deburred.
Non flat parts are manufactured out of aluminum. Some parts on the lathe as the tail wheel and some wheels for the head turning. Everything else on my mill.
Here are some of my screw ups:
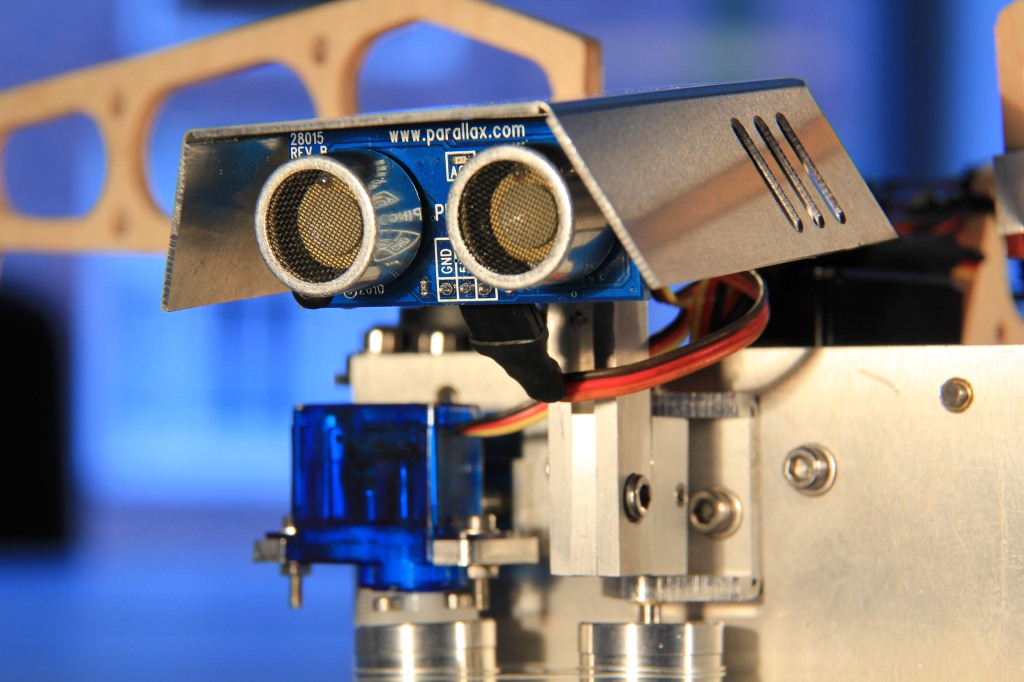
- I milled the hat out of 3mm aluminum plate. That came out really solid. Much too solid for the tiny servo that tilts the head. The new part was made out of 1mm plate.
- The structure of the head was milled out of 3mm plate with 1.5mm indents for easy bending. Problem was: the indents were on the wrong side.
- Legs and body were made two times. The proportions weren’t right the first time.
- The clamp for the turning servo was made two times. The first looked great, but couldn’t be attached to the base.
- The ribs for the battery holder were made two times. The first had only one rail and was not rigid enough.
- Many more …
Most facepalm moments came from sloppy design. The parts itself looked fine, but often doesn’t fit to the base structure. Maybe another (better) 3D CAD program would help. If you have suggestions (Mac), please let me know in the comments.
Power supply
Power comes from four AA eneloop batteries (Ni-MH). That gives around 6V when fully charged and low as 4.6V when almost discharged. I’m routing power through a Pololu adjustable step-up/step-down voltage regulator. That is tuned to deliver 6V on the output. These 6V are then fed into Arduino’s Vin and used to power the servos. 6V on Arduino’s Vin may be a bit low but seems to work OK.
Electronics
The brain is an Arduino Micro. That is quite the same as a Leonardo, but smaller and designed to fit on a breadboard. I soldered a couple of headers to the board to be able to connect all five servo connectors. As the Micro has no mounting holes, I glued neodymium magnets to the board and the body. That worked well.
The only sensor is a Parallax PING))) ultrasonic sensor. This one works really fine, better as most of the infrared rangers I tried.
All servos are Hitec ones. I’m using HS-311 for the arms, HS-5485HB for the lifting and small HS-55 for turning and tilting the head. The HS-55 are quite loud, compared to the bigger ones. The servo for lifting the whole body needs quite a bit of torque, which the HS-5485HB has.
Software
Software is quite straight forward, a giant state machine, that takes input from the sensor, every now and then.
halfbug has 5 different movements, one regular forward movement, one turn (left and right) and one turn hard (left and right). In addition to that halfbug has a head movement (left-right-straight) or looks left when turning left. Both, leg and head movement is controlled by separate sub-state machines.
There was a gotcha with my software. I had a lot of servo jitter, as you can see in the making-of video. Turned out that the standard Servo library that comes with Arduino and the MsTimer2 lib don’t play together so well. I’ve checked the code a bit and I’m not sure what really the problem was. I would blame disabling interrupts, if I had to guess. Anyhow, I removed the timer lib for now and the jitter is completely gone.
Wrap-up
This was one of my longer running projects and there were a couple of times where I had doubts if I would ever finish it. In the process I had some fails but mostly it was a matter of re-designing and re-doing a part. Then, the first time halfbug was doing push-ups on my desk, super cool. I learned a lot and have still a ton to learn.
If you like robots like this one, be sure to check out Beatty Robotics. They do awesome robotics projects.
Links
- More pictures at Flickr
- Arduino firmware and 2D CAD files at github
- Parallax PING)))
- Pololu Adjustable Step-Up/Step-Down Voltage Regulator S7V8A
- QCAD
- CamBam
- Universal Gcode sender


Great robot, the parts you made are beautiful (I am very envious of your tools). The movement of your bot is almost identical to the half-a-zombie bot I built. I tried a gait where the arms were 180′ out of phase, but it didn’t work because there was too much friction against the ground. I bet with your wheel it would work nicely though. (link to mine in case you are interested, there is a video in the first step http://www.instructables.com/id/Make-a-Crawling-Robot-Zombie-with-Severed-Legs/ )
LikeLike
Hey Ossum,
saw your zombie bot as it was on had (or make?).
Funny, I thought of building exactly what you did in the beginning, but couldn’t figure out how to build the arms. Then, over time, it formed into the robot thing.
Great build and great result!
Cheers, Alex
LikeLike
I expect you saw it on HAD (that was a bit of a life goal achieved ;-) I had all kinds of fancy plans for the arms before I settled on the basic dowels and bolts that I used, but I had the benefit of the “zombie” excuse when if the movements came out a bit imprecise.
Looking forward to seeing more robots and things from you and your new tools!
Ciao
Jason
LikeLike