
I just finished the tengu clone on a prototype board. Here are some pictures.

As you can see, everything fits nice under the LED display.
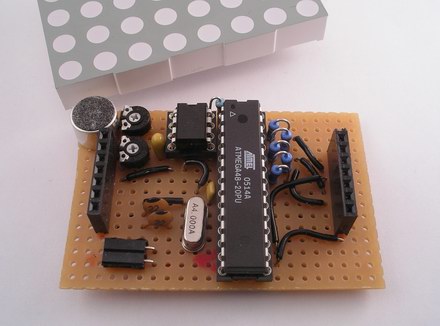
The next step would be to design a PCB of it.

More and full size pictures at Flickr.
Links

I just finished the tengu clone on a prototype board. Here are some pictures.
As you can see, everything fits nice under the LED display.
The next step would be to design a PCB of it.
More and full size pictures at Flickr.
Links
Comments are closed.

Hmmm…i like your cool project especially that related to LED…good job man.. :)
LikeLike
PCB! PCB!
I can’t wait till you make one.
LikeLike
Really nice! Can you produce a PCB? I’d order a kit from you in a flash.
LikeLike
Love you clone project.
I’m new to Arduino and am not sure how to get your “face.c” code to compile as an Arduino sketch.
Is it a simple cut and paste or do I have to “compile” it another way.
Would appreciate your help so I can build my own.
Thanks in advance.
LikeLike
Hi Sid,
the “face.c” is not a suitable source file for the Arduino. It has to be compiled with avr-gcc and then programmed into an ATmega48 microcontroller.
On the other hand, the Arduino uses an ATmega168 controller which is of the same “family” as the ATmega48. And Wiring, the Arduino programming language, is only a C or C++ dialect with some simplifications.
So, it should be possible to port the Tengu clone to Arduino. After a quick look at the source, I think the hardest will be to tweak the timing until you get it right.
Have look at http://www.freeduino.org/ or at http://www.arduino.cc/playground/ for more info on how to connect an Arduino to a dot matrix.
Cheers,
Alex
LikeLike
Thanks Alex
I have successfully linked an 8×8 matrix so will have a go at getting your clone idea to work.
Appreciate your advice.
LikeLike